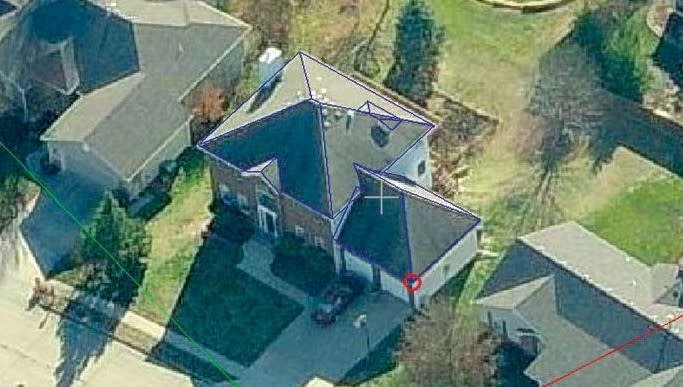
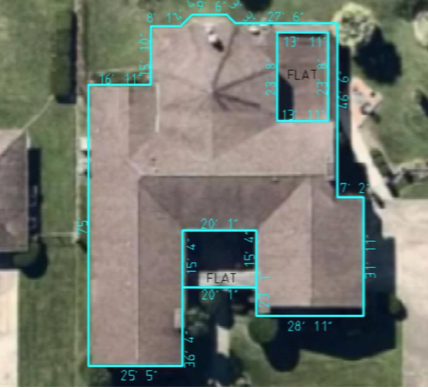
Accuracy Is The Key To Success. No Other Words Can Explain The Importance. Our Aerial Roof Measurement Reports Are Prepared By Trained CAD Technicians Followed By A 3 Step Verification Process By A Quality Assurance Professional, Certifying Absolute Data Accuracy On Every Report We Deliver.
Call us : (315) 926 1777
Email: info@skyroofmeasure.com
Created by roofing experts, for roofing experts, SkyRoofMeasure provides comprehensive and affordable roof measurement reports to save you time and money. Reports are based on high-quality, up-to-date aerial imagery and help contractors and insurers quickly and easily estimate roofing jobs.
What do you need to know about aerial roof measurement?
HOW TO ESTIMATE THE SIZE OF YOUR ROOF
Step One: Sketch Out Your Roof on Grid Paper
By doing this, you will have a much easier time figuring out the roof pitch and the roof surface areas. The best way to go about this by getting the longest dimension of the roof. A good thing to remember is that one roof square is equal to 100 square feet. Count how many squares there are and take that number and convert it into the measurement units you want to use for your drawing.
Step Two: Fill in the Details of Your Roof
Take note of things like valleys, diagonal distances, protrusions, overhangs, dormers, and hips as these will need their own measurements. Chimneys, vents, skylights, trim, and even pipes all affect the surface area of the roof. You may need to use binoculars to count out the squares of shingles in places that are unreachable. Sketch these areas out onto your roof diagram before moving onto the next step.
Step Three: Determine Roof Pitch
There are three ways by which you can measure your roof’s pitch.
- Grab a ladder and place a level a foot or so up on the roof and hold. Measure the 12-inch mark from the bottom of the level down onto the roof. If this distance measures at four then you have a 4 in 12, or if it measures at 8, you have an 8 in 12 pitch.
- Grab a ladder and jump up at the end of your house where the gable is. Place the level on the gable trim, flat against the house. Measure from the 12-inch mark on the level up to the bottom edge of the gable’s trim. The distance you get is the roof’s rise.
- If you have an attic, you can place the level against one of the rafters and mark where the 12-inch mark is on the bottom of the rafter. Measure from the end of the level up to the bottom edge, and this will give you the roof’s rise.
The most common roof is a 6 in 12, which is a 27-degree angle with anything above this being anywhere between 30 and 45 degrees. Anything below a 6 in 12 is anywhere from a 5 to 23-degree angle.

Step Four: Calculate the Area of Your Roof
There are a few ways you can go about this, but typically the easiest way is to calculate the simple areas of the roof and then calculate the more complex areas. You can do this by finding out the estimated amount of how many shingles you will need. Measure out the length and width of each plane on your roof, including things like hips, dormers, and adjacent pitches. Multiply the length by the width to get the square footage of each plane.
Step Five: Input Results into a Roofing Calculator
Once you have the roof size in square feet (or in length times width as feet), the roof pitch, and the material you want your shingle to be, you can use a roofing calculator to get the total square feet of the roof area, the number of squares it has, and what the range of the installation cost will be. The average 1,700 square foot roof will have a roof area of around 1,901 square feet with twenty squares, and an installation cost of anywhere between $7,224 to $14,300.
When Ordering a Roofing Report Is More Effective: Even an experienced roofer/drone operator will need to study any photos or footage of a property carefully in order to make a detailed estimate or contract. Drones may be effective tools, but they are essentially just eyes in the sky – you might still run the risk of the operator miscalculating or misjudging critical data that can impact your orders, scheduling, and bottom line.
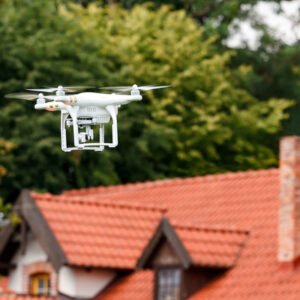
Know Your Teams’ Skillsets and Tools: Using drones for your roofing or contracting business can be a huge asset when it comes to documentation and archives. However, it’s important that you don’t come to rely on the skillset and license of one or two people.
Make sure your drone operators are professional – you are trusting them with an expensive piece of company property. While accidents can always happen, you should make sure that the person operating the drone always has their certified FAA license on hand, and can report back immediately if something does happen to the drone.
Know when a drone is an asset, and when it’s more cost and time effective to order a report. This may be up to your rep’s discretion, or you may have a protocol in place. Either way, it’s important to remember that while the drone is a fantastic piece of technology, that doesn’t always mean it’s the ONLY technology at their disposal.


